Next.js – v14 토스페이먼츠 API 결제 구현 방법
토스페이먼츠로 결제를 연동해야하는 일이 생겨버렸습니다. Next.js로 작업은 처음이라 문법이나 기타 등등이 너무 어렵습니다. 그래도 Next.js 기반의 웹사이트에 토스페이먼츠 결제 기능을 연동하는 방법을 작성 해보려고 합니다. 결제 버튼 구현부터 테스트 결제 승인까지 단계별 설명하며, 프론트엔드와 백엔드 간 통신 흐름을 작업한 저나 (혹은 나만) 참고할 만한 분들이 보아도 이해할 수 있도록 작성해 보겠습니다.
주문 결제 후 작업(데이터베이스 저장, 알림 발송 등등에 대해서는 서술하지 않았습니다.)
토스페이먼츠에서 제공하는 결제연동 방법은 여러가지가 있는 듯 합니다. 연동하려는 버전 및 모듈을 잘 확인하고 작업을 진행하면 좋습니다.
결제 흐름의 전체 구조 이해하기
Next.js에서는 클라이언트와 API 라우트 서버를 동시에 구성할 수 있어 결제 요청과 승인 응답을 한 프레임워크 안에서 처리하기 좋습니다. 기본 결제 흐름은 다음과 같습니다.
| 단계 | 설명 |
|---|---|
| 1단계 | 사용자 결제 버튼 클릭 |
| 2단계 | 프론트에서 결제정보 서버 전송 |
| 3단계 | 서버에서 결제 요청 후 결제창 응답 반환 |
| 4단계 | 클라이언트에서 결제창 호출 및 결과 처리 |
| 5단계 | 결제 승인 및 서버 결과 저장 |
핵심은 프론트와 백엔드 간 결제정보 전송 → 응답 처리 → 승인 후콜백 흐름을 정확히 맞추는 것입니다.
결제위젯 랜더하기
스크립트 태그 또는 npm 패키지로 결제위젯 SDK를 설치하세요.
API 버전
npm install @tosspayments/payment-sdk --save

위젯 버전 1
npm install @tosspayments/payment-widget-sdk

위젯 버전 2
npm install @tosspayments/tosspayments-sdk --save
npm install @tosspayments/payment-sdk –save 명령어를 활용해서 설치를 하였습니다.
npm을 설치하다보면 보안상 취약점(vulnerabilities)이 포함된 패키지들이 있다는 npm의 경고가 나올때가 있습니다. 설치는 성공했지만, 의존성(dependencies)의 취약점 개선이 필요합니다. 해당 부분은 당장의 토스 페이먼츠 결제와 관련이 없으므로 넘어가겠습니다.
API 키 생성은 공식 홈페이지에서 확인할 수 있습니다.
결제버튼 컴포넌트

결제가 진행되는 버튼은 여러곳에서 사용하기 때문에 컴포넌트가 구성을 하였습니다. 환경 변수 설정은 .env에 설정 하였습니다.
/componemts/tossPaymentButtun.tsx

'use client';

import {loadTossPayments, TossPaymentsInstance} from "@tosspayments/payment-sdk";
import React, {useCallback} from 'react';
import {v4 as uuidv4} from "uuid";

const generateOrderId = (): string => {
    return `order_${uuidv4()}`;
};

type TossPaymentButtonProps = {
    orderName: string;
    amount: number;
};

export default function TossPaymentButton({ orderName, amount }: TossPaymentButtonProps) {
    const handleClick = useCallback(async () => {
        const clientKey = process.env.NEXT_PUBLIC_TOSS_PAYMENT_CLIENT_KEY;

        if (!clientKey) {
            console.error("Toss Payment Client Key is not defined");
            return;
        }

        let tossPayments: TossPaymentsInstance;

        try {
            tossPayments = await loadTossPayments(clientKey);
        } catch (error) {
            console.error("Failed to load Toss Payments SDK:", error);
            return;
        }

        // "카드"는 변경 가능합니다.
        try {
            await tossPayments.requestPayment("카드", {
                amount: amount,
                orderId: generateOrderId(),
                orderName: orderName,
                customerName: "홍길동",
                successUrl: `${window.location.origin}/api/tosspayment/confirm`,
                failUrl: `${window.location.origin}/tosspayment/fail`,
            });
        } catch (error) {
            console.error("Toss Payments request failed:", error);
        }
    }, [orderName, amount]);

    return (
        <div>
            <button onClick={handleClick}>{orderName} 시작하기</button>
        </div>
    );
}

// ClientPage.tsx
<TossPaymentButton orderName="베이직 플랜" amount={basicPlanAmount} />
<TossPaymentButton orderName="플러스 플랜" amount={plusPlanAmount} />
컴포넌트에 주문에 대한 정보(orderName, Amount)를 넘겼지만 실무에서는 결제 금액을 포함한 주문정보는 백엔드에서 다시 설정해야 안전합니다.
결제가 성공하면 /api/tosspayment/confirm 실패하면 /tosspayment/fail로 이동합니다. 하지만 실패하는 테스트는 하지 않았습니다.
테스트 결제 진행

실제 결제가 안 되니 테스트하기가 너무 편합니다. 테스트 후 결제 취소를 해야하는 작업이 없으니 번거롭지가 않습니다.
API 라우트: 결제 요청 처리
/app/api/tosspayment/confirm/route.ts

import { NextRequest, NextResponse } from "next/server";

type TossPaymentConfirmResponse = {
    orderId: string;
    paymentKey: string;
    orderName: string;
    approvedAt: string;
    method: string;
    totalAmount: number;
};

type TossErrorResponse = {
    message?: string;
    code?: string;
};


export async function GET(req: NextRequest): Promise<NextResponse> {
    const { searchParams } = new URL(req.url);
    const orderId = searchParams.get("orderId");
    const paymentKey = searchParams.get("paymentKey");
    const amount = searchParams.get("amount");

    if (!orderId || !paymentKey || !amount) {
        return NextResponse.json({ error: "Missing required parameters" }, { status: 400 });
    }

    const secretKey = process.env.TOSS_PAYMENT_SECRET_KEY;

    if (!secretKey) {
        return NextResponse.json({ error: "Missing TOSS_PAYMENT_SECRET_KEY in env" }, { status: 500 });
    }

    const url = "https://api.tosspayments.com/v1/payments/confirm";
    const basicToken = Buffer.from(`${secretKey}:`, "utf-8").toString("base64");

    try {
        const response = await fetch(url, {
            method: "POST",
            headers: {
                Authorization: `Basic ${basicToken}`,
                "Content-Type": "application/json",
            },
            body: JSON.stringify({
                orderId,
                paymentKey,
                amount: Number(amount),
            }),
        });

        const data = (await response.json()) as TossPaymentConfirmResponse | TossErrorResponse;

        if (!response.ok) {
            console.error("Toss confirm error response:", data);
            return NextResponse.json(
                { error: (data as TossErrorResponse).message || "Payment confirmation failed" },
                { status: response.status }
            );
        }

        // TODO: DB 처리
        return NextResponse.redirect(
            `${process.env.NEXT_PUBLIC_BASE_URL || 'http://localhost:3000'}/tosspayment/success?orderId=${orderId}`
        );
    } catch (error) {
        console.error("Toss Payments confirm error:", error);
        return NextResponse.json({ error: "Unexpected error during payment confirmation" }, { status: 500 });
    }
}
route.ts 파일을 사용하는 이유
Next.js 13 이상부터는 App Router에서 파일 기반 라우팅(File-based Routing)이 다음과 같이 변경되었습니다
📂 App Router 구조 예시
app/
└── api/
└── tosspayment/
└── confirm/⮕
└── route.tsAPI endpoint
위처럼 route.ts 또는 route.js 파일이 HTTP method 핸들러 (GET, POST, PUT, …)를 export 하는 방식으로 동작합니다. 다른 이름 (hello.ts, api.ts, handler.ts) 등은 인식되지 않습니다.
리디렉션 이후 페이지 구성 (성공 / 실패)
/app/tosspayment/success/page.tsx

import { notFound } from "next/navigation";

type TossPaymentsResponse = {
    orderId: string;
    orderName: string;
    approvedAt: string;
    card?: {
        company: string;
        number: string;
        amount: number;
    };
};

type PageProps = {
    searchParams: {
        orderId?: string;
    };
};

export default async function Page({ searchParams }: PageProps) {
    const orderId = searchParams.orderId;

    if (!orderId) {
        return notFound();
    }

    const secretKey = process.env.TOSS_PAYMENT_SECRET_KEY || "";
    const basicToken = Buffer.from(`${secretKey}:`, "utf-8").toString("base64");

    const url = `https://api.tosspayments.com/v1/payments/orders/${orderId}`;

    let payments: TossPaymentsResponse;
    try {
        const res = await fetch(url, {
            headers: {
                Authorization: `Basic ${basicToken}`,
                "Content-Type": "application/json",
            },
            cache: "no-store", // 🔒 실시간 정보 조회에 적합
        });

        if (!res.ok) throw new Error("Failed to fetch payment info");

        payments = await res.json();
    } catch (error) {
        console.error("Toss Payment Fetch Error:", error);
        return (
            <div>
                <h1>결제 정보를 불러오는 중 오류가 발생했습니다.</h1>
            </div>
        );
    }

    const { card } = payments;

    return (
        <div>
            <h1>결제가 완료되었습니다</h1>
            <ul>
                <li>결제 상품: {payments.orderName}</li>
                <li>주문번호: {payments.orderId}</li>
                <li>카드회사: {card?.company || "N/A"}</li>
                <li>카드번호: {card?.number || "N/A"}</li>
                <li>결제금액: {card?.amount.toLocaleString()}원</li>
                <li>
                    결제승인날짜:{" "}
                    {new Intl.DateTimeFormat("ko-KR", {
                        dateStyle: "full",
                        timeStyle: "short",
                    }).format(new Date(payments.approvedAt))}
                </li>
            </ul>
        </div>
    );
}
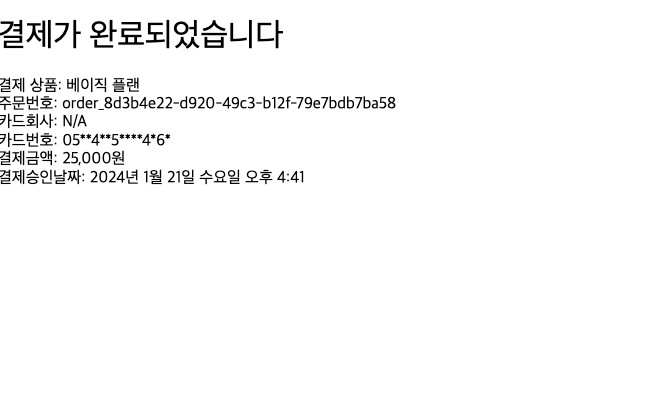
어떠한 정보를 노출하고 어떻게 꾸밀지는 잘 정해서 마무리하면 됩니다.
/app/tosspayment/fail/page.tsx

'use client';

import { useSearchParams } from 'next/navigation';

export default function FailPage() {
    const searchParams = useSearchParams();

    const code = searchParams?.get('code') ?? '알 수 없음';
    const message = searchParams?.get('message') ?? '원인을 알 수 없습니다.';

    return (
        <div className="result wrapper">
            <div className="box_section">
                <h2>결제 실패</h2>
                <p>{`에러 코드: ${code}`}</p>
                <p>{`실패 사유: ${message}`}</p>
            </div>
        </div>
    );
}
결제 후 데이터베이스에 저장해야 하는 이유
결제가 끝나도 끝이 아니다, 서비스 제공을 위한 최종 단계는 ‘저장’. Toss Payments를 통한 결제가 성공적으로 완료되었다면, 사용자에게 단순히 “결제가 완료되었습니다”라고 안내하는 것만으로는 부족합니다. 실제로 사용자의 결제 내역을 서버에 저장하고, 그 정보를 기반으로 서비스 이용 권한을 부여하거나 플랜 상태를 갱신하는 과정이 반드시 필요합니다.
왜 결제 데이터를 저장해야 할까?
사용자 플랜 활성화: 사용자가 어떤 요금제를 결제했는지 기록해야, 로그인 시 그에 맞는 서비스 권한을 부여할 수 있습니다.
결제 내역 확인 및 증빙: 사용자가 마이페이지에서 결제 이력을 확인하거나, 관리자가 결제 문제를 대응할 수 있도록 데이터가 필요합니다.
결제 승인 여부 검증: Toss Payments의 성공 페이지로 이동했다고 해서 결제가 실제로 승인된 것은 아닐 수 있습니다. 반드시 서버에서 토스 API를 통해 결제 승인 확인 후 저장해야 신뢰할 수 있습니다.
정기 결제 및 갱신 로직 연계: 추후 월 단위 자동 갱신 기능을 구현하기 위해서도 최초 결제일, 플랜 종류, 주문 ID 등의 데이터는 반드시 저장되어야 합니다.
저장해야 하는 주요 정보
거래 고유번호(paymentKey): 추후 환불 및 검증 시 필수
주문 ID(orderId): 고유 식별자, 중복 방지 및 추적용
결제 금액(amount): 가격 이슈 추적 및 정산 기준
주문명/상품명(orderName): 서비스 제공 기준
사용자 ID(userId): 어떤 사용자가 결제했는지
결제 시각(paymentTime): 유효기간 및 정기 결제 기준일
결제 상태(status): 결제 완료/취소/실패 여부
결제 수단(method): 카드, 가상계좌 등 구분 가능
이러한 정보를 기록해두면 추후 환불 처리, 서비스 중단, 고객센터 대응이 매우 원활해집니다.
저장 타이밍: 언제 데이터베이스에 저장해야 하나?
결제 성공 후, 토스에서 리디렉션한 successUrl에서 결제 요청 시 함께 넘겨받은 paymentKey, orderId, amount 정보를 다시 한 번 토스 API에 POST하여 결제 승인(confirm)을 받아야 합니다.
/componemts/tossPaymentButtun.tsx
try {
        await tossPayments.requestPayment("카드", {
            amount: amount,
            orderId: generateOrderId(),
            orderName: orderName,
            customerName: "홍길동",
            successUrl: `${window.location.origin}/api/tosspayment/confirm`,
            failUrl: `${window.location.origin}/tosspayment/fail`,
        });
    } catch (error) {
        console.error("Toss Payments request failed:", error);
}


/app/api/tosspayment/confirm/route.ts
try {
    const response = await fetch(url, {
        method: "POST",
        headers: {
            Authorization: `Basic ${basicToken}`,
            "Content-Type": "application/json",
        },
        body: JSON.stringify({
            orderId,
            paymentKey,
            amount: Number(amount),
        }),
    });

    const data = (await response.json()) as TossPaymentConfirmResponse | TossErrorResponse;

    if (!response.ok) {
        console.error("Toss confirm error response:", data);
        return NextResponse.json(
            { error: (data as TossErrorResponse).message || "Payment confirmation failed" },
            { status: response.status }
        );
    }

    // TODO: DB 처리
    return NextResponse.redirect(
        `${process.env.NEXT_PUBLIC_BASE_URL || 'http://localhost:3000'}/tosspayment/success?orderId=${orderId}`
    );
} catch (error) {
    console.error("Toss Payments confirm error:", error);
    return NextResponse.json({ error: "Unexpected error during payment confirmation" }, { status: 500 });
}
TossPaymentButton.tsx에서 프론트엔드 결제 요청을 하였습니다.loadTossPayments 로 SDK 로딩, requestPayment 실행 후 successUrl, failUrl에 redirect, orderId, amount, paymentKey → successUrl에 전달됨
서버사이드 승인 요청 (/app/api/tosspayment/confirm)
GET 요청으로 넘어온 orderId, paymentKey, amount 파싱, 토스 API의 /v1/payments/confirm로 POST 요청, 결과 확인 후 성공 시 redirect 처리
TODO: DB 처리 해당 부분에서 Database 저장처리 및 다른 작업을 수행하면 됩니다.
참고 유튜브 – NextJs 결제연동하기 (feat. Toss/토스페이먼츠)